How to get started with Midjourney API
Posted on 2023/09/01 by GoAPI
Hi everyone, we are very excited to make this introductory tutorial to show you how to use GoAPI's API for Midjourney !
Full disclosure, this is not an official API by Midjourney. We are a team of computer graphics experts and backend engineers. With the advent of generative AI, we fell in love with Midjourney, and thought this neat API service can help a lot of developers to be incorporated into their existing workflow.
Sign up for our Dashboard and get free credits to try out our API's! To get started, go to GoAPI's Midjourney API Documentation , where you will be able to see the list of endpoints that we currently offer (and we are constantly maintaining and adding more endpoints).

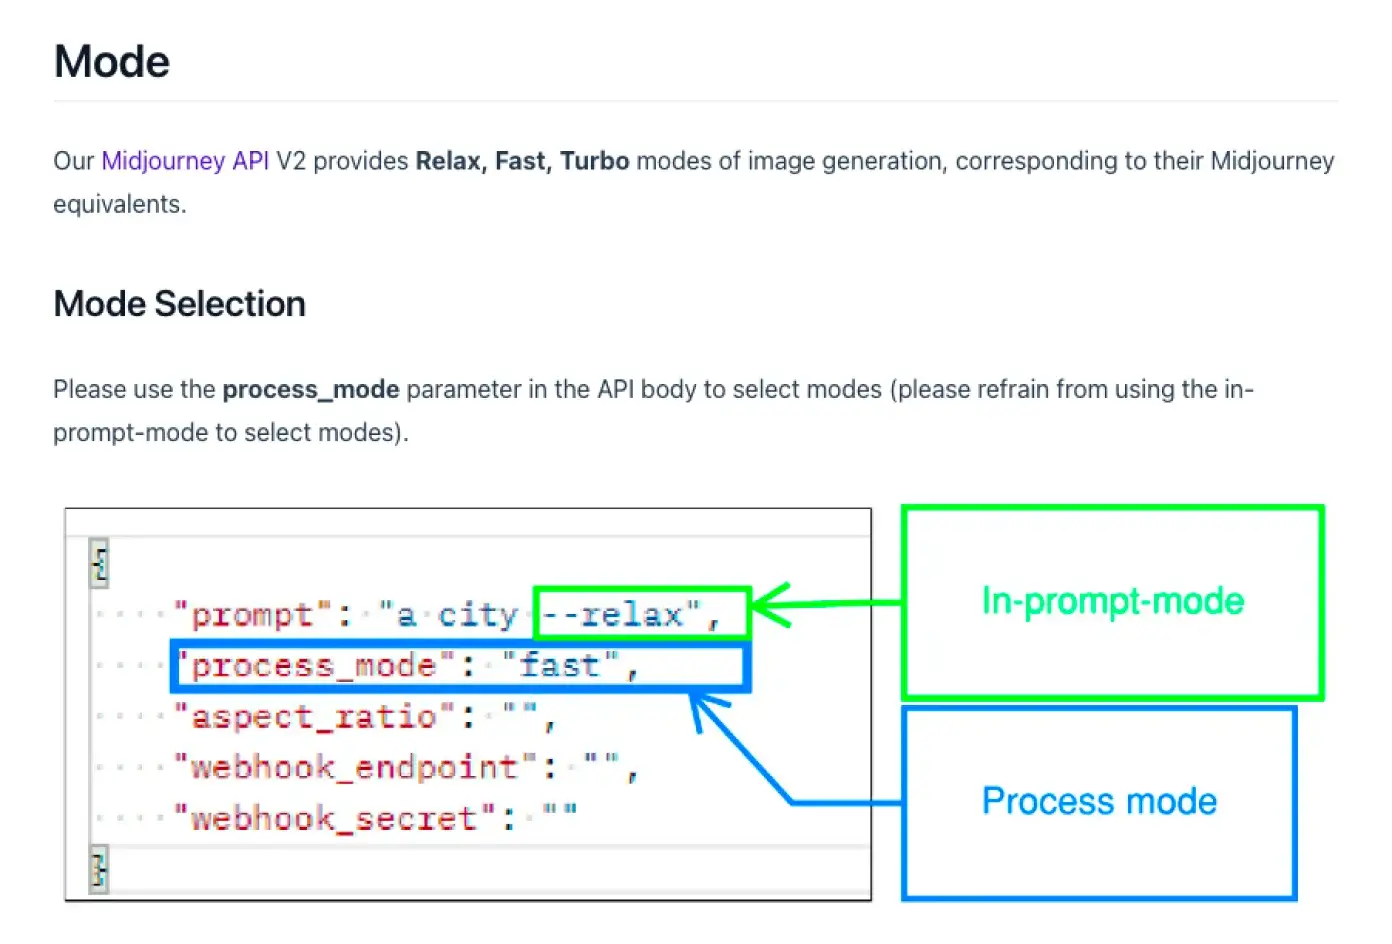
You can also see the different processing modes that we offer: 'relaxed mode' from GoAPI means that your task will either be processed under Midjourney's relaxed or fast mode, 'fast mode' from GoAPI means that your task will only be processed under Midjourney's fast mode, and 'turbo mode' from GoAPI means that your task will only be processed under Midjourney's turbo mode.
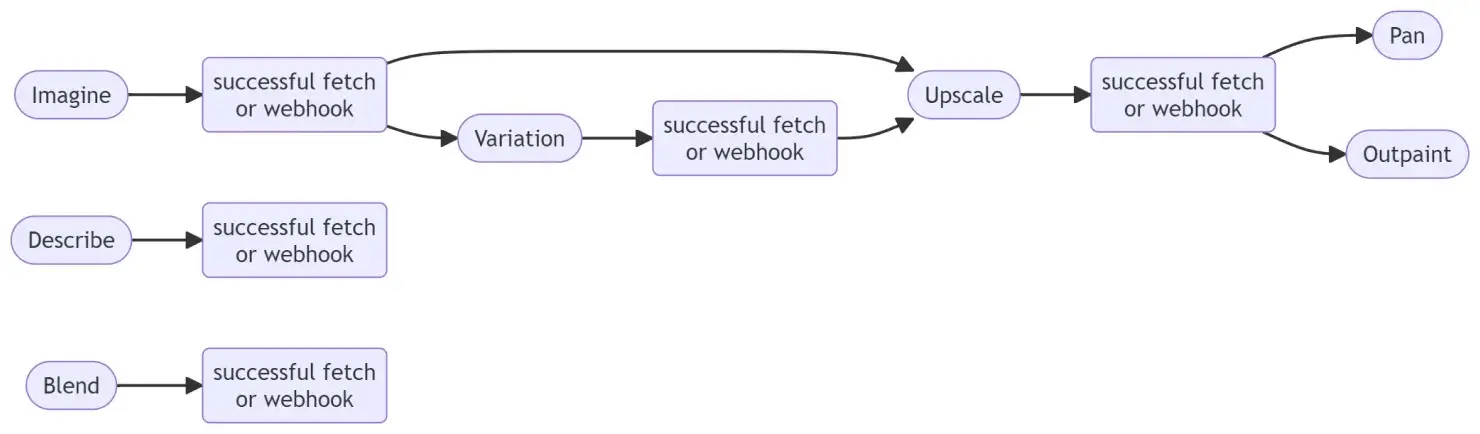
Below is an explanation of potential workflows using the currently available endpoints. For this tutorial, we are just going to use the imagine endpoint, and perform a successful fetch on the result of the imagine task submitted.
Now to get started, you can
Next, we are going to use Postman to test out our API service. Postman is an API platform for developers. You can use their desktop version or their web version for this tutorial.
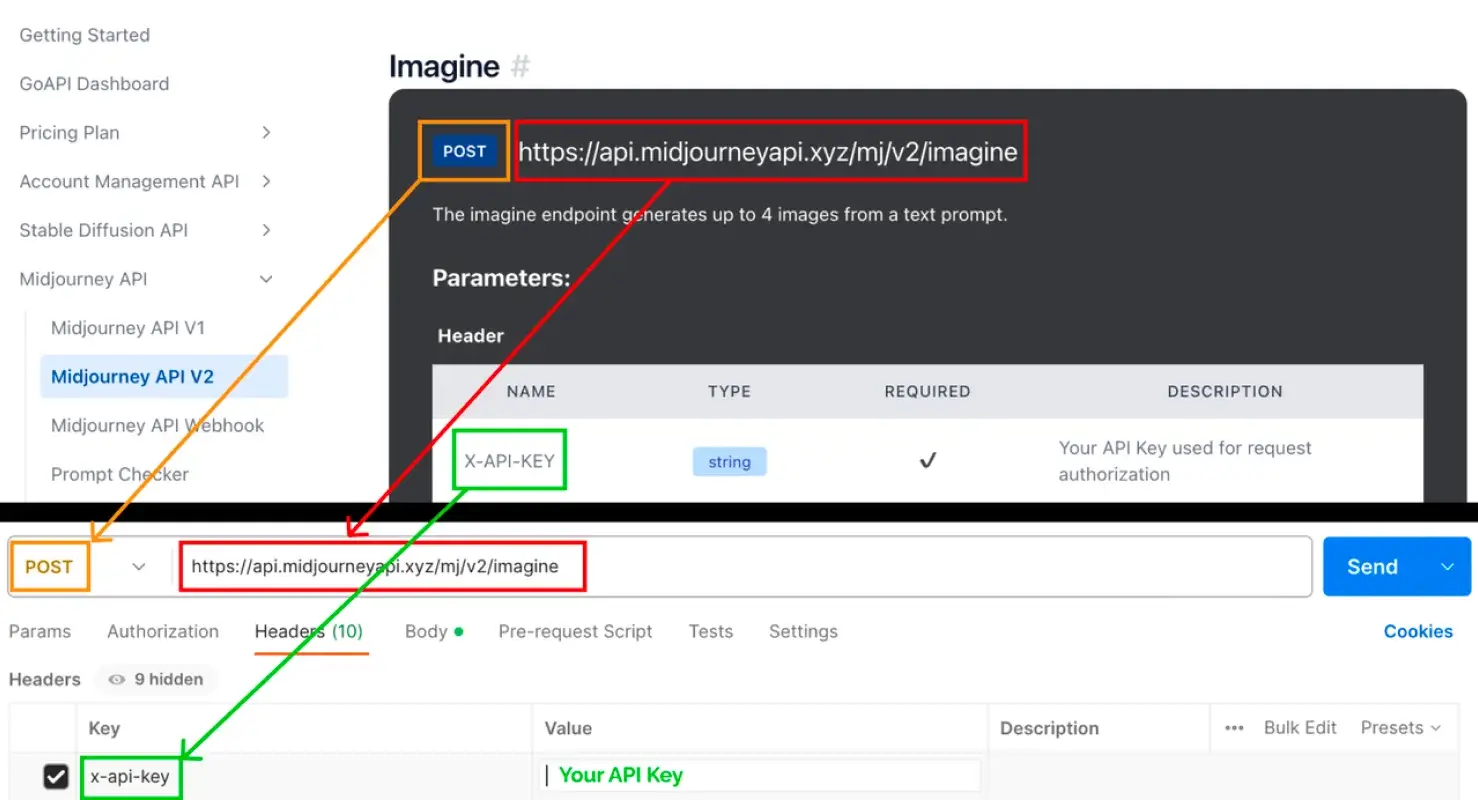
Download/open up Postman, create a new HTTP request, change the request to POST.
Under Headers, type 'X-API-KEY' under the Key, and your API key under Value.
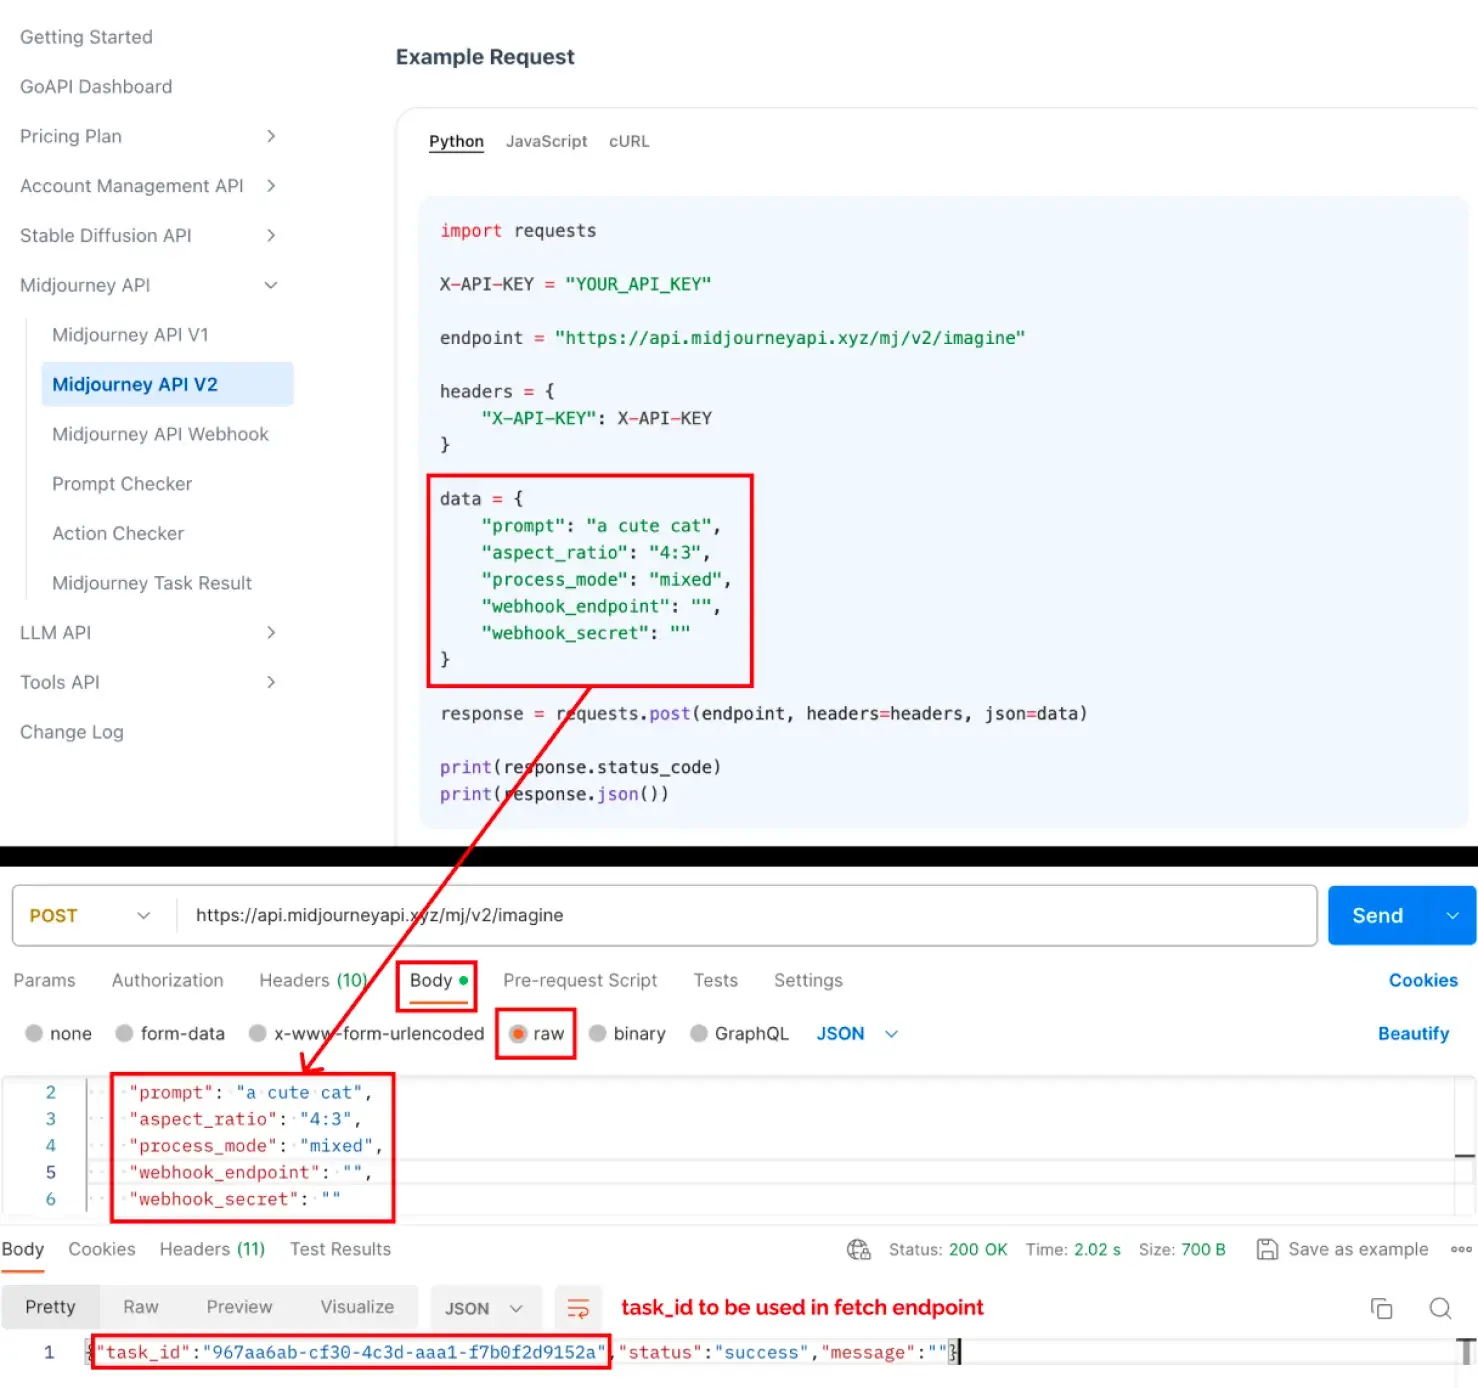
Under Body, click 'raw'. and copy the python code from our docs into the body.
And press the Send button
Next, create a new HTTP request, change the request to POST. Find the Fetch endpoint in our documentation, copy the endpoint url and do the following as shown in the screenshot below. Press Send, and you will get the URLs to your picture in the Response.
endpoint in our documentation, copy the endpoint url and do the following as shown in the screenshot below. Press Send, and you would get the URLs to your picture in the Response.
When you send the fetch request, the result might say 'pending' or 'processing' instead of 'finished' which means that you would have to wait for a bit and then re-send the fetch post request. If you don't want to wait, you could also use the webhook function, which will send you a message automatically after the task in completed. We will cover how to use the webhook in another tutorial.
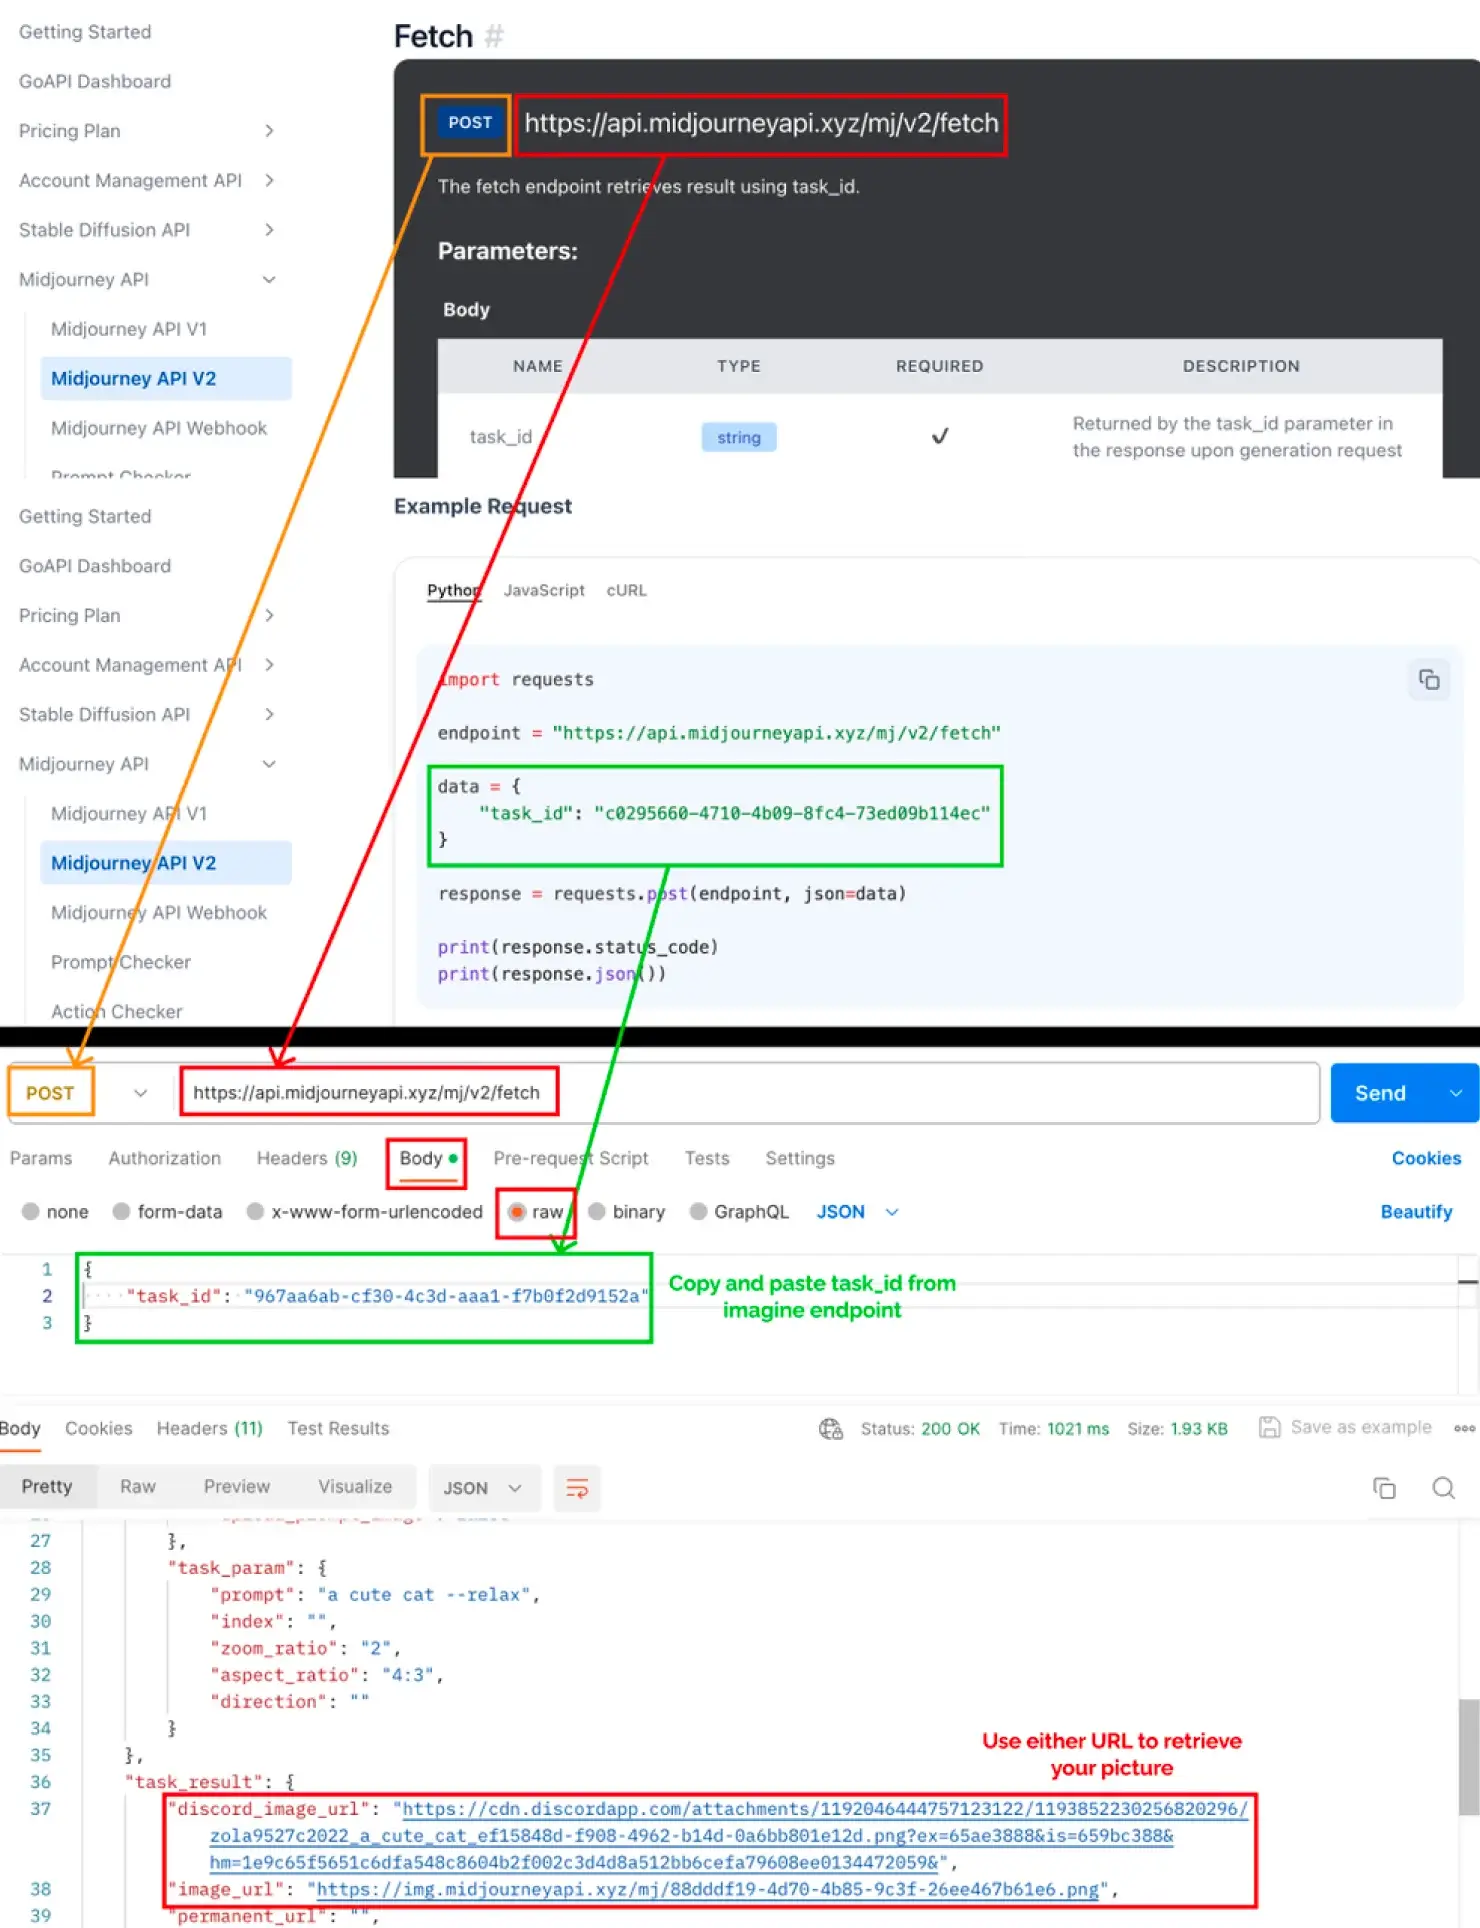
Finally, copy the returned URL into your web browser to retrieve your picture!
And that is how you get started with GoAPI's API in a few minutes. Thank you for getting this far through the tutorial, and feel free to share our service with anyone who might find it useful!
Our pricing
For Midjourney, each API call will work out to be about $0.015USD for relaxed mode, $0.045USD in fast mode, and $0.1USD in turbo mode. Thus, if you do the math on how many pictures you use per month, you might find that our pricing is very competitive for your needs.
You can go to our documentation's pricing plans, to see the pricing info we have for our Midjourney API and the other API's(GPT, DALLE, Stable Diffusion and more) that we offer!